(Click for a larger view)
(Click for a larger view)
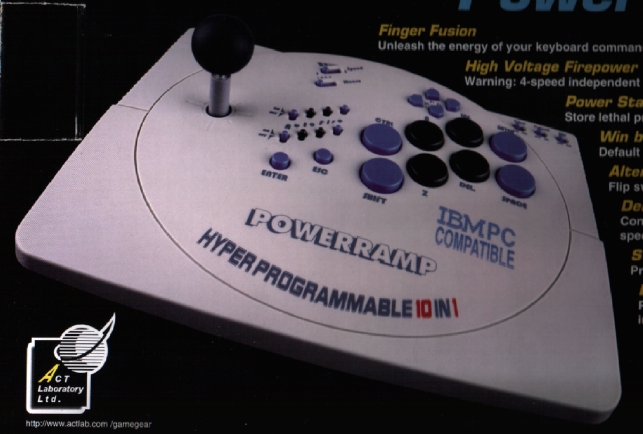
There's been a lot of excitement about using the PowerRamp from ActLabs as the brains of an arcade control project. I know of at least one incredible cabinet that has done just that, Roswell 88201. After they dropped to $20(!) I purchased one myself to see what it was all about.Unfortunately, they are no longer being sold. However, in the event you find one, perhaps this will be useful.They appear to be available again!They're not available again, and this time it looks permanent :( On this page you'll find pictures I've taken, message threads about the PowerRamp, and any other info I can gather.
Adding up the above, you can see the PowerRamp has 22 programmable inputs you can use, along with a variety of optional toggle switches to modify their behaviors. 14 of the inputs are straightforward "connect-wire1-to-wire2" types. The joystick is programmable along all 8 directions, but only has 4 micro-switches under it. Up/Down/Left/Right will be straightforward, but to use a button for the diagonal, I expect you'll have to rig your arcade control button to activate two buttons on the PowerRamp joystick, simulating the diagonal direction.
(From a message by Tom61): A note about the autofire switches - they don't appear to register to most classic MAME games. I've wanted to use autofire in Vanguard, but it only registers the first press. I think that the repeat rate is too fast (even in PowerRamp's "slow" setting) and registers as a held down button. (Thanks Tom! -- saint)
(From a message by Spazzman): Via two of toggle switches, you can choose up to five different pre-programmed settings. I.E. you can program a layout for MAME, then switch to layer 2 and program a layout for Callus, then layer 3, and layer 4. Of course, doing it this way means you'll need to mount the toggle switch somewhere accessible.
Daisychaining: The PowerRamps can be daisychained allowing theoretically double the number of controls. However - there have been reports of problems with stuck keystrokes in daisychained situations. See the message captures for more information below.
Programming: Programming the PowerRamp can all be done via the joystick itself - no software required. This makes it an ideal interface for people running non-MS operating systems.
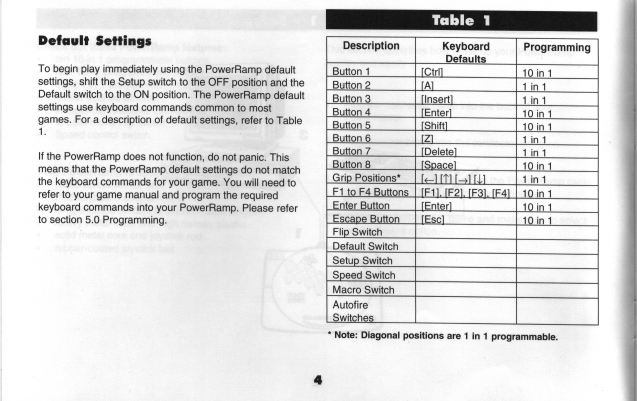 |
Figure 1 - table of the default programmed settings of the PowerRamp. |
| Figure 2 - Diagram of the various controls of the PowerRamp. | 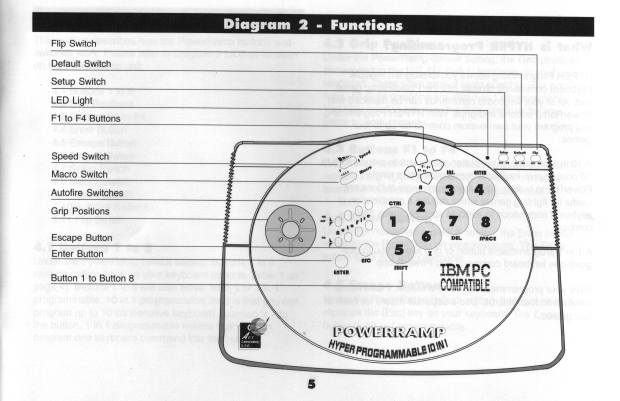 |
(Click for a larger view) |
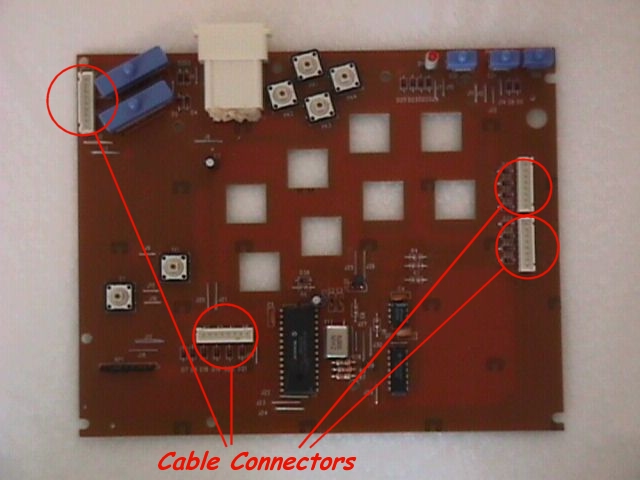
The PowerRamp's circuit board. Notice the circled cable connectors. These are your easiest connection points. The other buttons and switches will require soldering to the pcb most likely. |
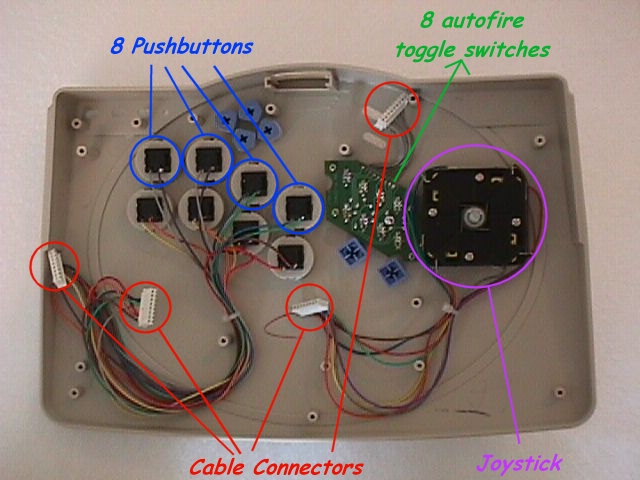
| Under the case of the PowerRamp. Notice the corresponding cable connectors for the PCB. The 8 pushbuttons are easy hacks. The 8 autofire toggle switches not as easy. The joystick should also be an easy hack. |
(Click for a larger view) |
(Click for a larger view) |
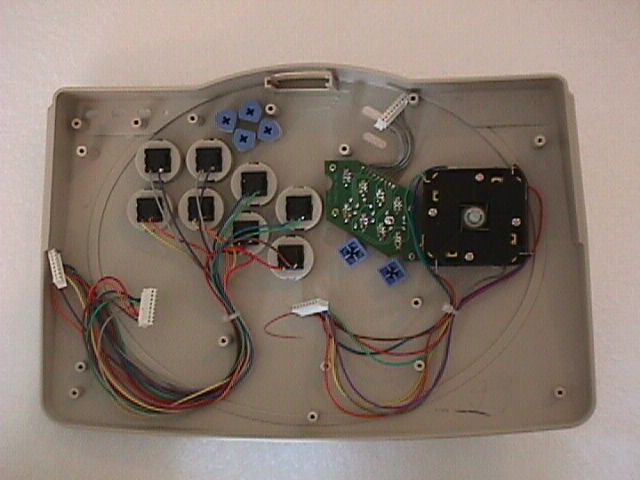
An uncluttered view under the case of the PowerRamp (same as above minus the captions). |
| Close up view of the buttons underneath the case. | 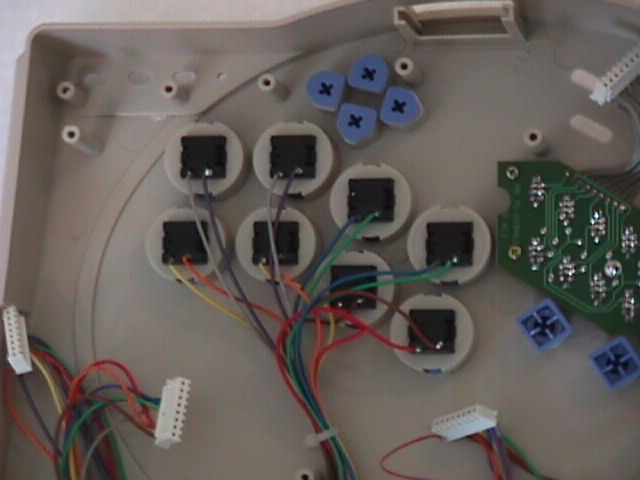
(Click for a larger view) |
(Click for a larger view) |
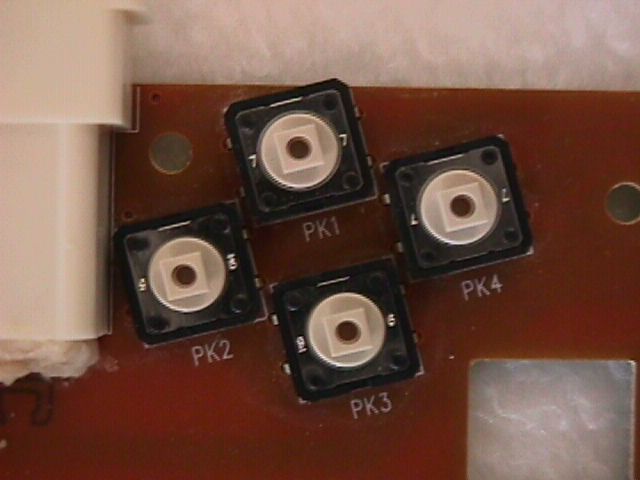
The other buttons are actual pushbuttons soldered onto the PCB and will require more effort to hack. Buttons originally configured to these controls are F1,F2,F3,F4,Enter, and ESC. Of course, any of the buttons can be reprogrammed. The only other controls not accounted for are 13 toggle switches - the 8 autofire switches, and 5 configuration switches. |
| Close up of the cable connectors on the PCB. Just to add fuel to the diode debate, notice that every input on the PowerRamp is run through a diode. | 
(Click for a larger view) |

(Click for a larger view) |
The keyboard connector. |
| The keyboard cable - nice the passthru for your keyboard. AT style keyboard cable shown here, PS/2 cable also included with PowerRamp. | 
(Click for a larger view) |
Stuck keystrokes
and a workaround
(from Exph on Arcade@Home's
message board):
I also got some mites recently (saint's note: PowerRamp Mite in this case, but similar and applicable to the PowerRamp) and had the same problem with locking up and sticking. One thing I noticed that was strange was that on the default "d" setting everything seemed fine and I had no control problems. The way I tested this was with Street Fighter Zero for mame. I tested how easily I could throw fireballs and do dragon punches. When I set it to "1" which I had programmed the same way as "d" is set up I had problems. I then tried mapping the blue + thing on the powerramp mite to be the up down left right control to see if that helped. To my surprise it did help a lot. For some reason the default directional pad seems to be slow when you program it. The other keys are much better. Of course this only helps if you are gutting the mite to use for arcade controls(what I am doing). As for hooking up 2 together. Wire the two joysticks plus six buttons for each player to the first mite. Make sure not to wire the joysticks to the directional pad on the mite (use it for buttons because it is too slow when programmed). Then with the second mite wire your insert coins and start buttons. This way all of the critical heat of battle keys will be accessible. Hope this helps. The mites are quite a deal as compared to a KE-24 or Hotrod...More on stuck keystrokes from ChrisF here:
ok, got my two powerramps, call them PRA and PRB. As I type this both are connected to this pc.Yet more on daisychaining from ChrisF here:The Upside...
First I tested PRA->PRB->Keyboard right out of the box. That worked and BOTH Powerramps could be configured seperately either via the keyboard or through the included software.
Next, I hacked PRB and tested it. I did this so if there was a problem it had to be with PRB. Then I hacked PRA and all is well.
The Downside...
Very minor so far, PRB has a button get stuck every now and then. A couple of taps clears it up. When play Asteriods I got stuck in a right spin a few times. But very easy to fix on the fly and a very minor gripe. PRA functions flawlessly even when PBR does this. So I'd suggest making PRA your main buttons board and PRB your secondary (less used) buttons board.
(saint - two separate posts, same conclusion. Seems like a good idea to me - "admin" keys on the second stick, "playing" keys on the first.)
Got email about the YKeyKey from the tech dept. The guy who wrote me says the PowerRamps would have to supply power as YKeyKey does not. So 4 PowerRamps is out for the moment.He went on to say that "ALT" on kb1 and "F" on kb2 would in fact send ALT+F to the pc. This is good and may be a solution to getting the second PowerRamp from sticking on occasion.